
Good evening! Is the Polar Vortex headed your way? I'm not sure what is headed here, but my fridge is full to bursting with food. It's cold but perfect sewing weather. I've been working on my Blue Baskets. [apologies to my regular non-quilty readers if this is a smidge repetitious].
String quilt history~ here is my friend Mel's memory of making string quilts with her mom, in Missuori, maybe 1970s?
I love string quilts, and just because they're a 'thing' right now doesn't mean squat. My mom used to make them, and like the vintage top, there were all kinds of prints in them - usually skinny scraps left over from making clothes, curtains, etc. Not much got thrown away! Mom would cut block-sized squares from newspaper and sit at the machine with a stack and a basket of scraps. She'd sew a short piece at one edge and fit longer strips all across until the block was covered. Actually, she just kept going from one block strip to the next block in a continuous line - I stood behind the sewing machine and very carefully snipped the thread between the blocks and stacked them back up for the next line through. I loved having a job to help! (I was maybe 4? Not very big!) Then when the paper squares were filled Mom would trim them and sew them together, and I 'got' to peel the paper off the backs, lol. Tedious job, I'm sure Mom appreciated that I LIKED doing it! [from Melody L/ Kansas]This project is SO FUN! I am having such a great time, I do love it. The design has been on my mind for a couple years so Lori's sewalong was the perfect impetus to get going. Inspiration quilt here.
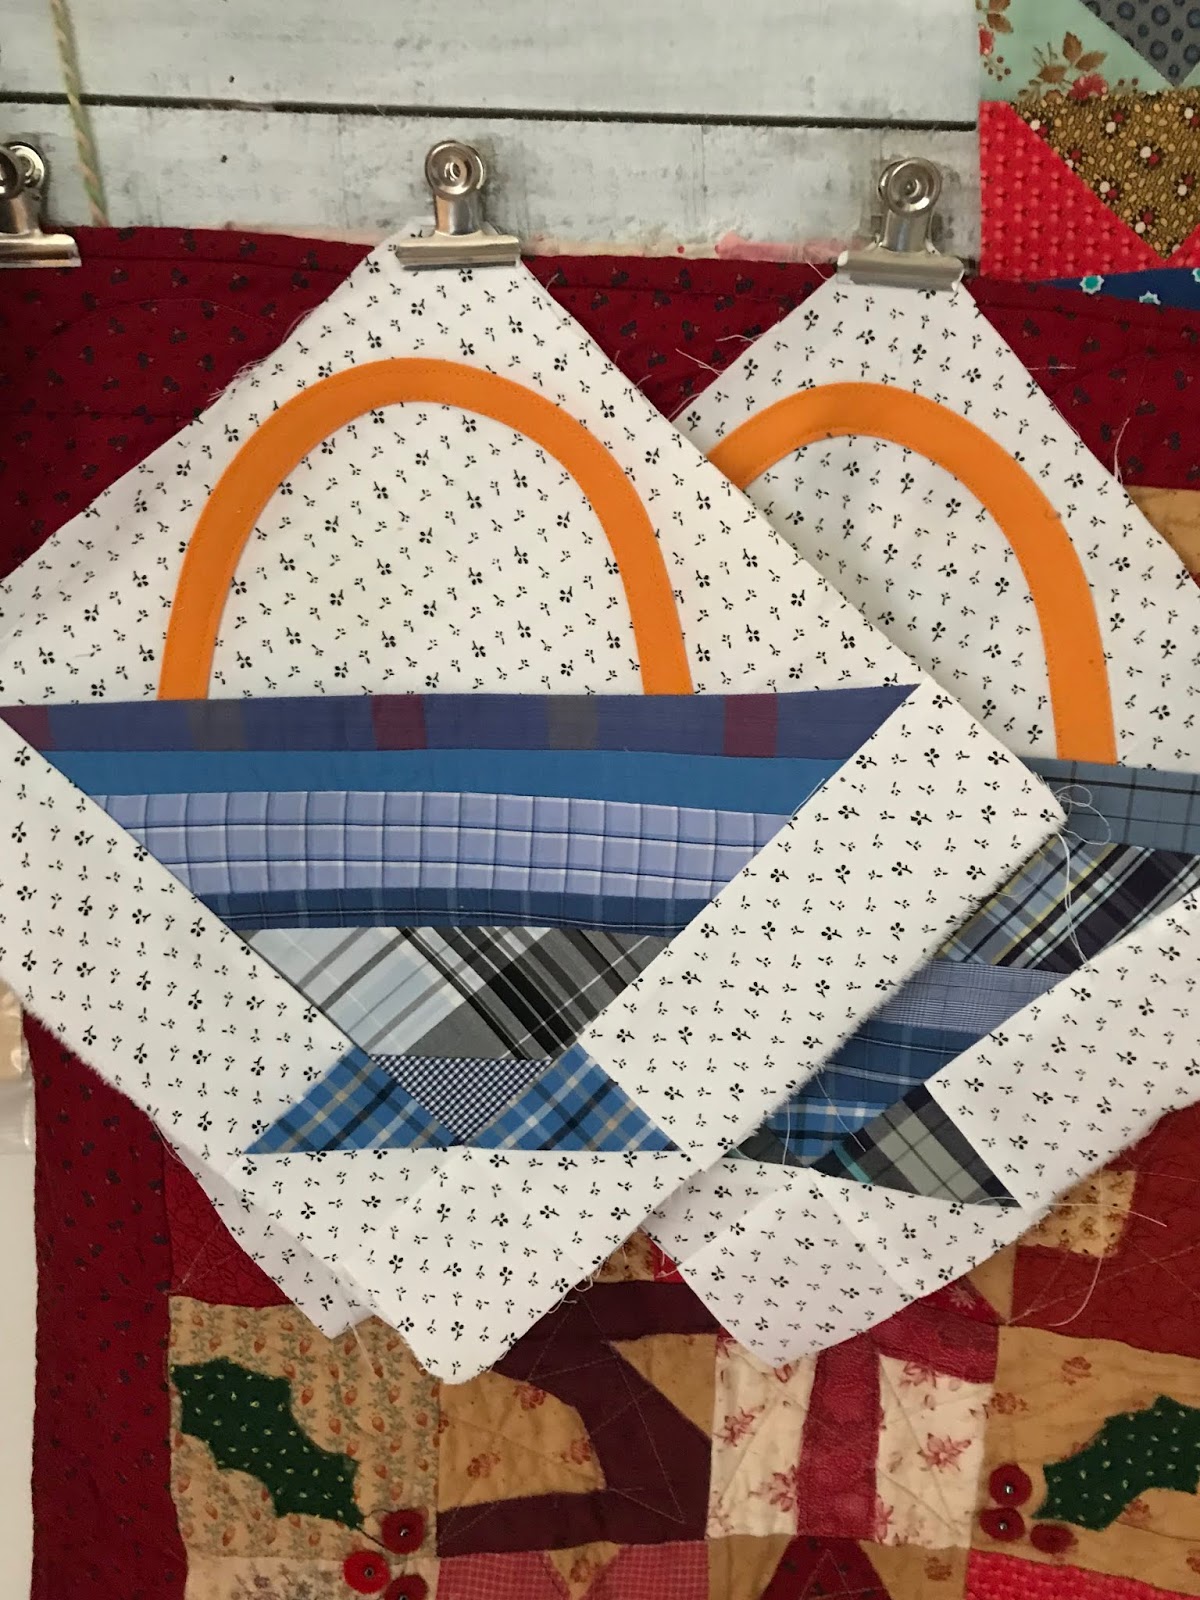
Four Baskets made so far!

The first two went slow as I worked out my pattern and method.
I do love working with patterns that I have drafted myself. I've always been a good patternmaker and I suppose using my own pattern takes "I wonder what she meant?" out of a project. Often both time wasting and annoying.

The biggest decision was about the construction of the base of the Basket. Sometimes that section is one big triangle.
Or it can be two HSTs and a square. I went with the squares, it's neater.

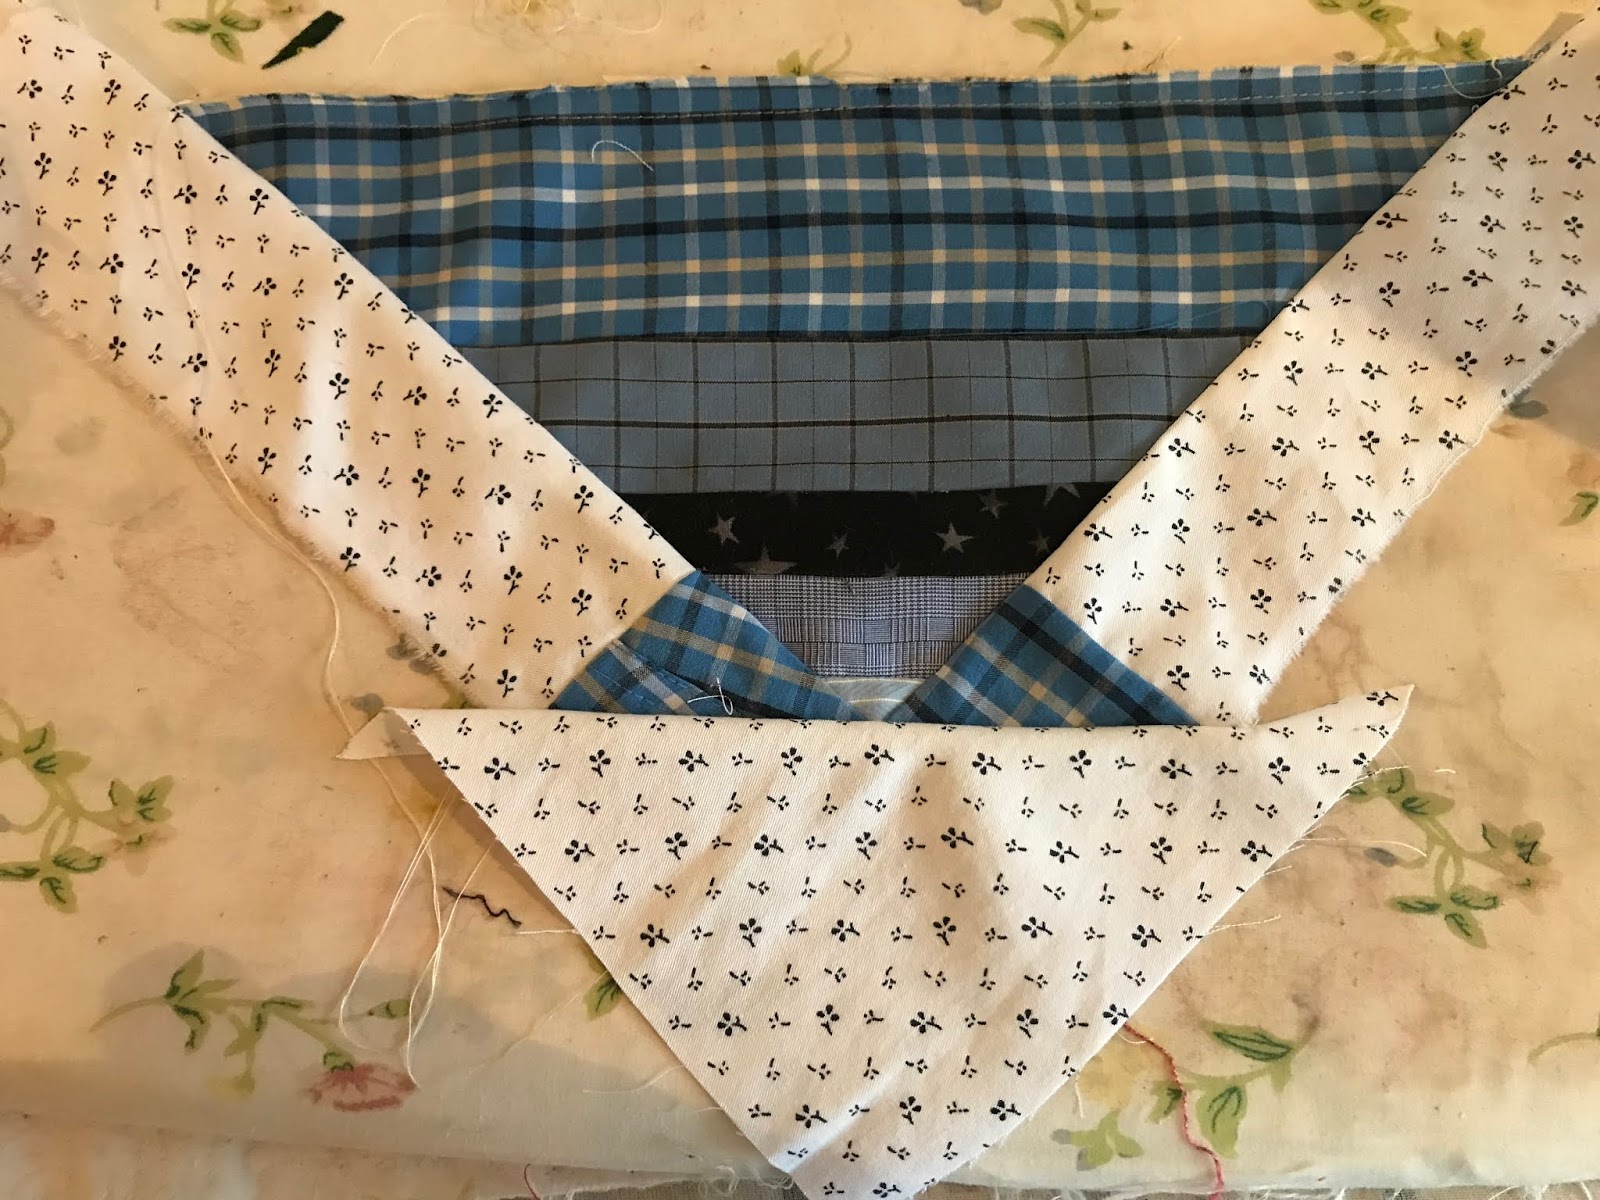
The strips are torn from my thrifted men's plaid shirts. I look for Ralph Lauren and a few other fine brands. The cotton is so fine and soft. Nice but I found that the strips do better if lightly starched.

This top blue solid is lovely but the fabric grows and ripples every time I press it. I hate to rip it out though.

I like tearing random strips, a nice change from the labor of cutting with scissors and templates or puzzling over rotary instructions, praying my finger tips survive.
 |
| "I help, mommy?" |
Unlike some quilters I don't deconstruct the shirts ahead of time. I always think, Oh how wasteful, what if I never use the cut ups bits, but the shirt is now destroyed. So far for the Baskets I'm just using a sleeve of each shirt for a random look.

Even the white shirting is an XXL GAP shirt. I'll use it up then switch to something similar,
maybe not a shirt though.

The cheddar handles are starched and ironed; I fold the double-fold bias by eye, and cut. Then trim to approximate length and press the arc firmly, stretching the piece as I iron.

Mark the handle hoop with a template and a Frixion pen.

[I've never had any probs w Frixion pens and I like them. My only complaint is they dry up very fast, so wasteful. BUT last week it was so cold in my sewing room that the dreaded white lines did appear on something. How funny and odd. The white lines disappeared with the touch of my iron, not an issue .]
As I mentioned above, I make patterns on paper, by hand, I make templates and cut with scissors. It's how I learned and I like it....I'm not into mass production or hurrying, or in making a thousand quilts per year.

I estimate my quilt will need about 25 10" Baskets. Possibly a zigzag setting in either the blue plaid shirts or a white sprig. Another option is spacer squares in a white ground shirting. Just, please, no sashing.

If you'd like to read my earlier post about my inspirations and choices of design, my previous string quilt, my antique string quilt, here is the link. A String Quilt Year
Pinterest design inspiration link HERE

PS To make note: this project is about string quilts, not scrap quilts; the correct term is String, not strip or Strippy. Strip quilts refers to a style of setting blocks in vertical columns with spacer fabrics, often striped or distinctively figured in between. So remember: your project is a String Quilt, not a Strippy, historically speaking.

love
lizzy
gone to the beach...............


Here's a link to Lori's show and tell/ linky post so you all can see everyone's string quilts! Scroll down to the end for all the other string quilts.


.jpg)


